If you are even thinking about starting a blog, then you are in need of the perfect Pinterest account. Look no further! Here, you will learn every step to create an amazing Pinterest business account for your blog… perfect for the blogging newbie!
Remember those days when you would scroll through Pinterest and see things like the most amazing chocolate cake and tips for traveling with your toddler? Well that was when you weren’t a blogger. Once you start to look at Pinterest through a bloggers eyes, you will realize there is so much more to Pinterest then you ever knew. And more then that, you need help setting up Pinterest for your blog!
*Feel free to follow me on Pinterest to see how my profile is set up and set yours up the same way!
Hopefully, by now you’ve at least set up your blog. If not, don’t worry! Head on over to Start a Blog for the Total Blogging Newbie and get started. Cause, duh, you’ll at least need to have a blog before you set up a Pinterest account for it.
Still not sure what blogging really is? Then you definitely need to read What Blogging is and How to Get Started
Facts on Pinterest
I’m not going to bore you with a Pinterest history lesson but it is good to know a few quick things about it before you get started. After all, Pinterest will be your top money maker for your blog so show a little respect!
Here come the boring facts…
Impressed much?
Setting up Pinterest for a blog
First things first, open a new Pinterest account.
Follow these steps to open a Pinterest Business account…
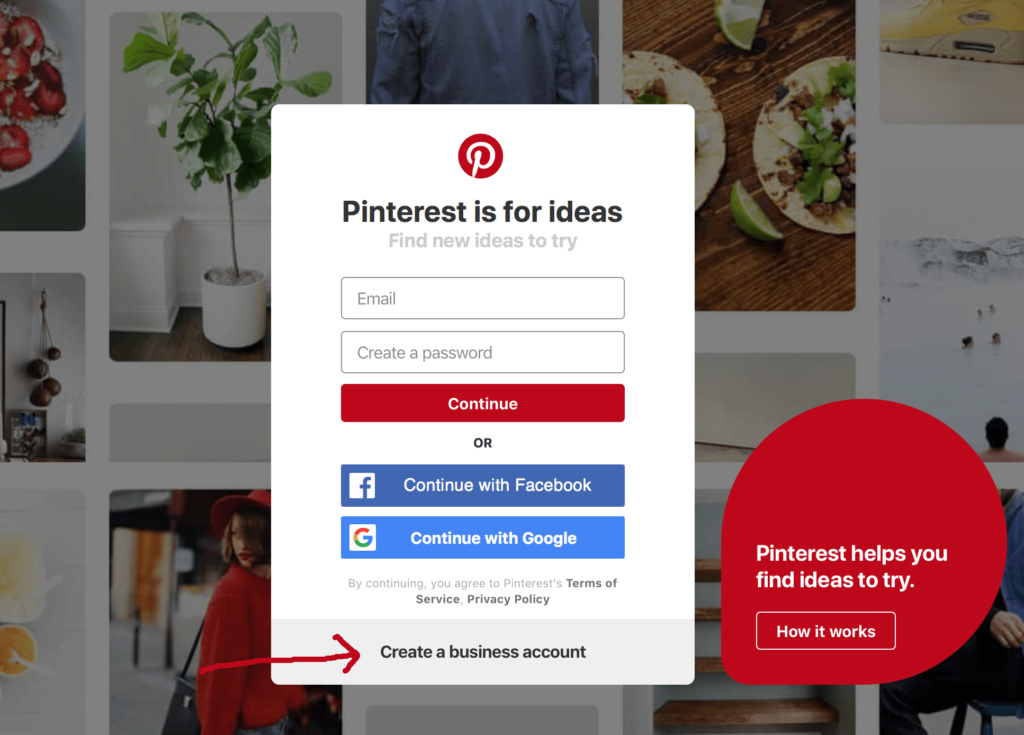
1) Click on the gray bar that says “Create a business account”
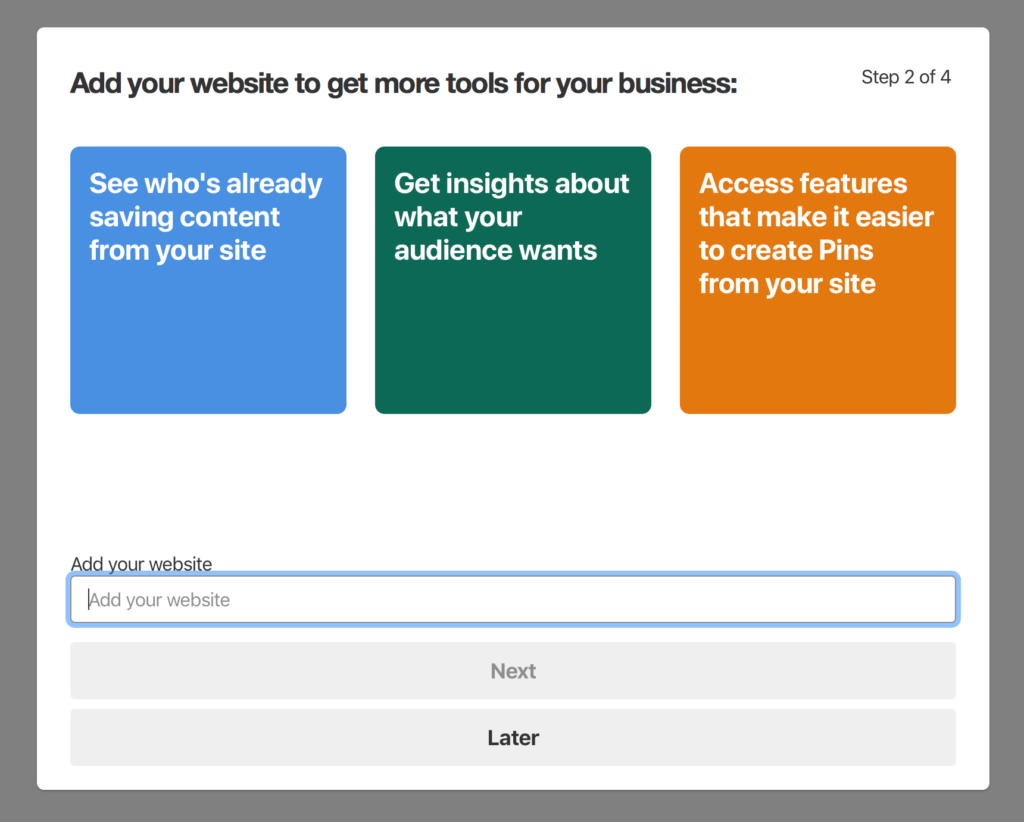
 2) The next step is to add your website. Even if you don’t actually have your website set up or launched yet, just go ahead and put in the URL for your new blog. Then hit “Next”.
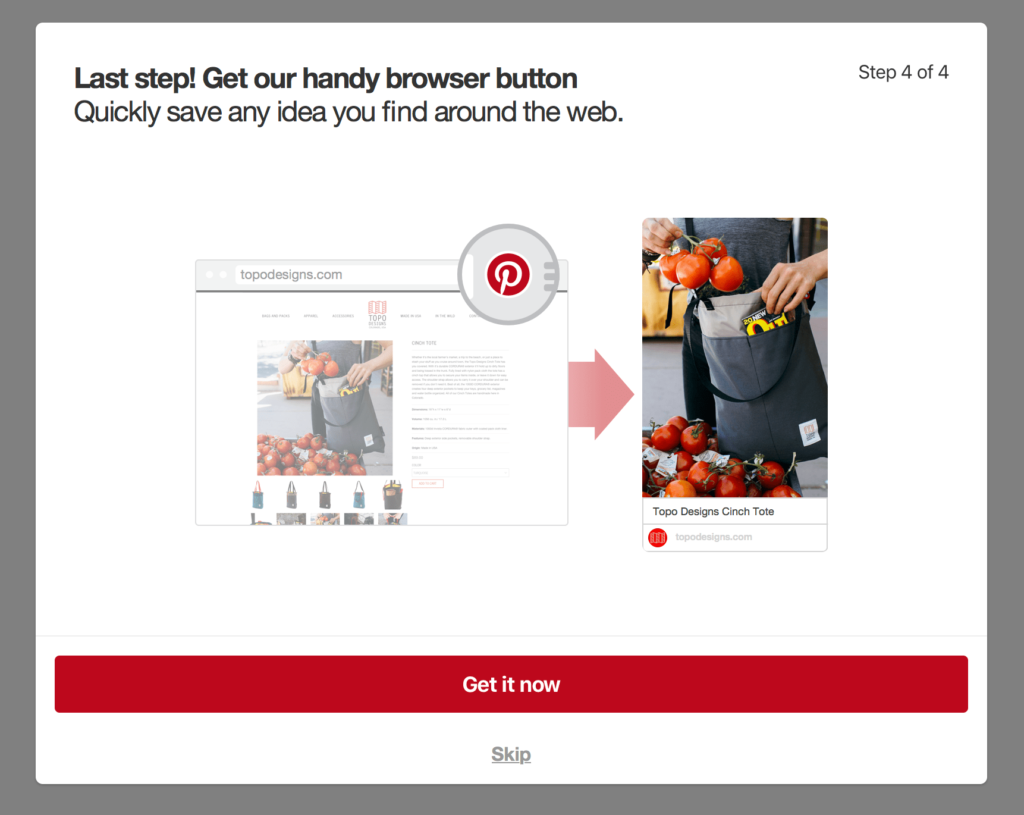
3) On to the next page! These first few pages are pretty self-explanatory, but I wanted to show them just in case someone out there is really lost. However, when you get to the page with the browser button, go ahead and hit skip. You can add this to your blog later. It involves code and I don’t recommend you worry about that until later on.
After your Pinterest business account is created…
Ok, your account is all set up! Now you get to have the fun of making it look pretty and being a good little Pinterest user. I say this because believe it or not, Pinterest keeps an eye on you. They watch when you pin and what you pin. And the happier you make Pinterest, the better your pins will perform. Let me explain more…
Remember when I said Pinterest is a search engine? Well, that means it runs off of keywords. It also runs visual searches but that’s meant more for the pins that you create and we are not quite there yet!
So keywords…
With a Pinterest business account, there are several places you need to add descriptions to and you should really put some thought into it. This is how people will find you, your boards and your pins. So don’t half-ass this part!
Your Profile Description
Setting up your profile is pretty important. It’s how other people find you. And you definitely want them to find you because when they find you… they find your blog! To edit your profile, find those three dots on the right-hand side of the menu bar. Click those and choose “settings”

4) When you choose Settings, your screen will look like this:
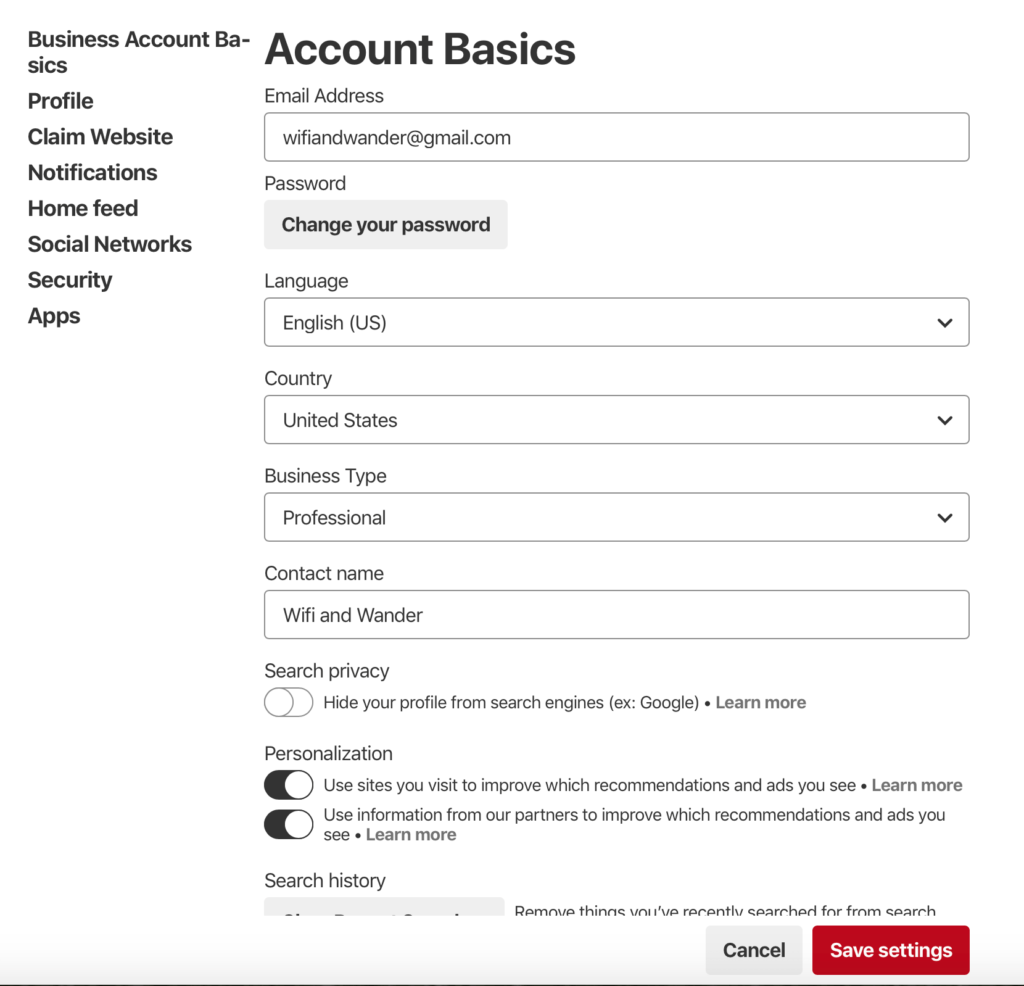
5) Fill out everything that you can and hit “Save Settings”. Continue down the list on the left-hand side by going to “Profile” next…
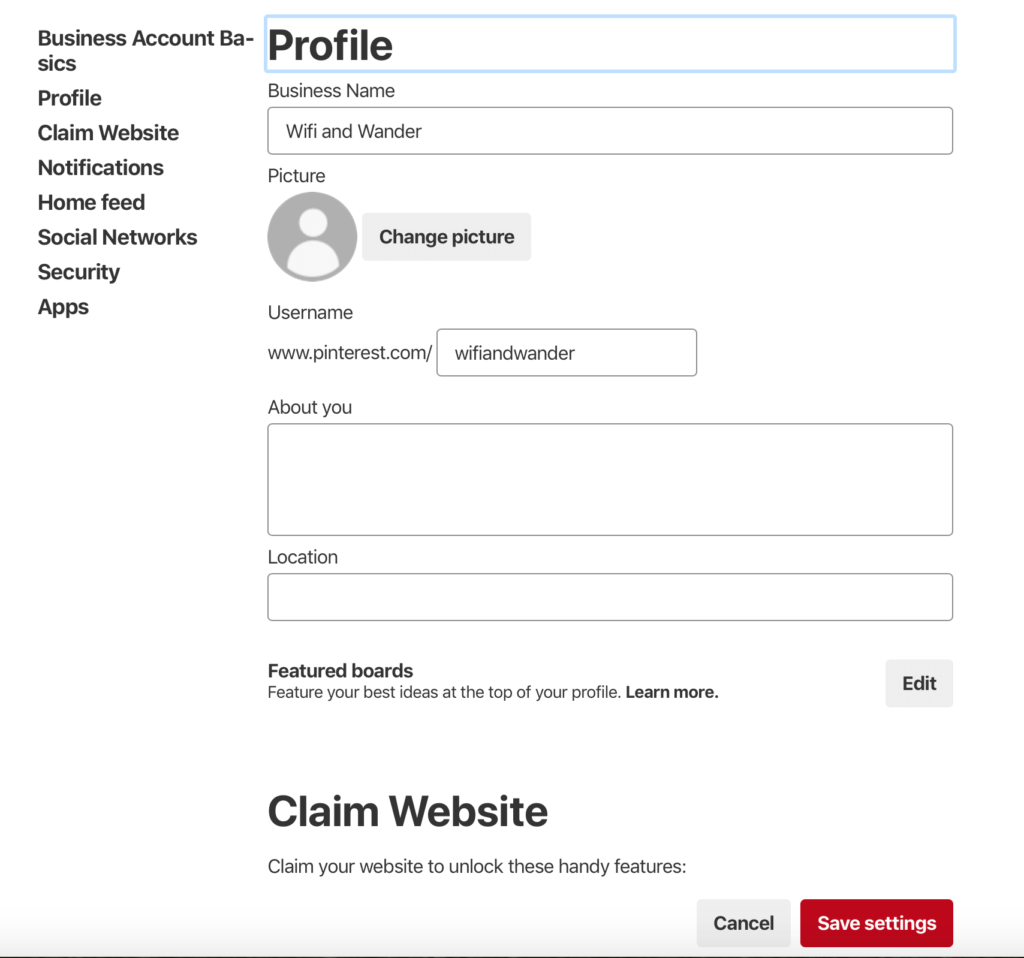
6) Fill out your profile as best and as detailed as you can. When you get to the “About You” section, add the top keywords that best describe your blog. The keywords used in this section will determine how people find you during a search. Don’t know what to say? Look at some of your other favorite bloggers to get some ideas. Then add a picture that best represents YOU and your blog. Not just some random photo from your cousins baby’s baptism.
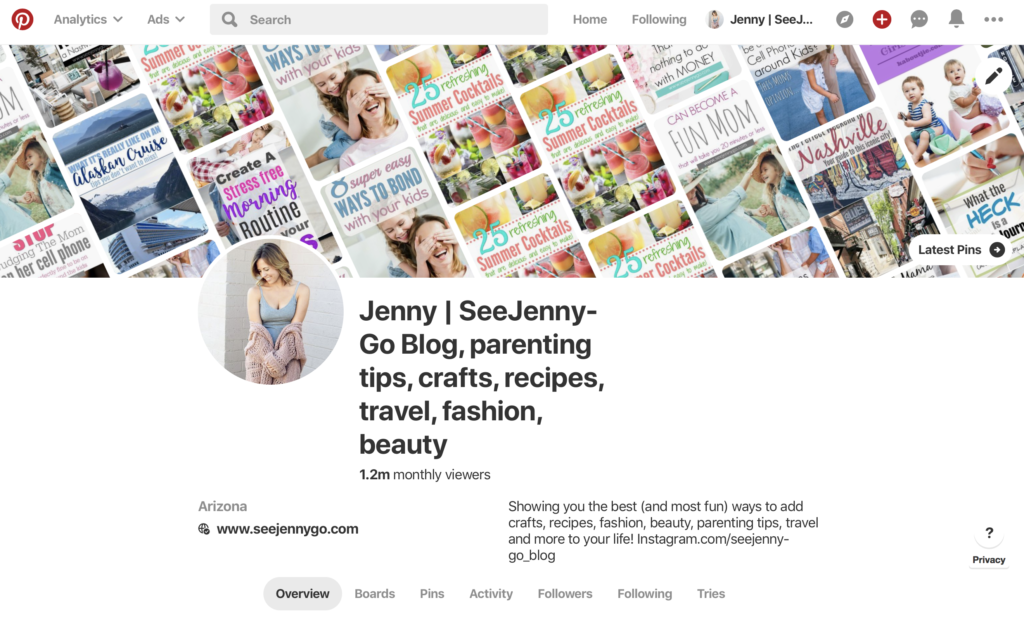
Here is an example of how my profile for See Jenny Go looks all set up. Notice all the keywords in my profile and in my Pinterest name?
7) Now onto setting up your boards. There are two different kinds of boards, your own personal boards, and group boards. We will talk about group boards later on. So for right now, let’s just talk about YOUR boards. You will want to create as many boards as you can that represent your blog, but won’t necessarily be filled with your pins. You need to fill those with 3rd party pins (other people’s pins).
Pinterest wants to know you are a good user and pinning other content, not just your own. Plus, it’s a great way to build your Pinterest account while you are still working on your own content. So, in the beginning, you want to be pinning 3rd party pins literally every day. Dozens a day even! And make sure its content is related to your blog.
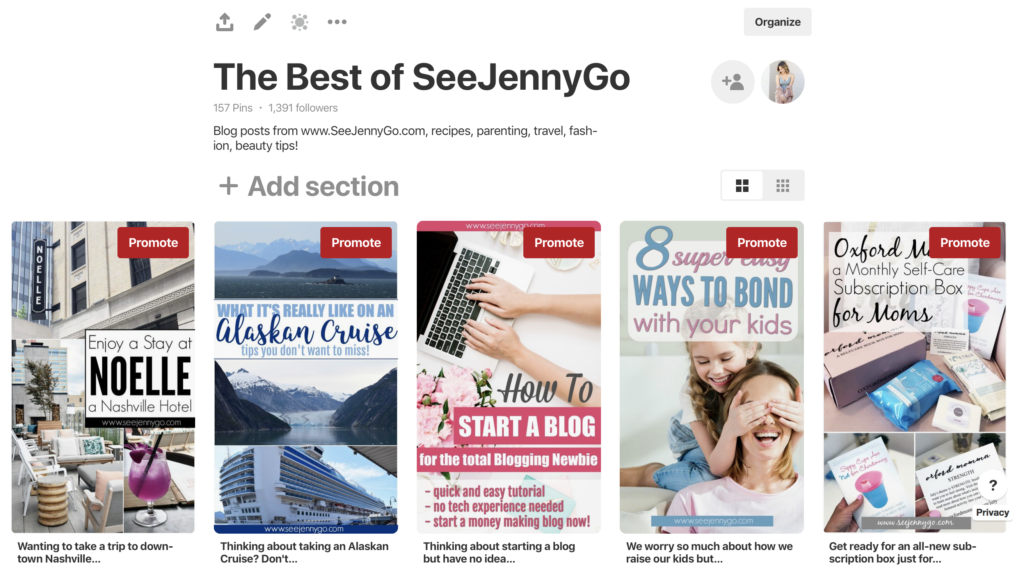
8) Your featured board. Your first and most important board should be named “The Best of(your blog name)”. This is where you will pin your pins… and ONLY your pins… once you start creating them. Make sure the board is named with your blog name and the description is filled out with lots of those fun keywords that apply to your blog. You want people to find your featured board and the best way to do that is with those keywords baby!
9) All the rest of your Pinterest boards. Go ahead now and start creating boards. You can name them anything you want but it’s better to keep them as generic as possible. Don’t try to get all creative here, save that for your blog post writing! For example “Food | Breakfast” is a much better option over something creative like “Yummy yum yum breakfast food”. And do you know whhhyyyyy? Cause keywords gurrrl! You have to keep the board names simple so they come up in searches better.
SIDE NOTE: I try to make my board names stand out so I added the line to make them distinct from group boards. So any board with the line in the middle is very clearly my own. You don’t have to set your boards up that way, this was just my personal preference (that happens to work really well!) Feel free to follow me on Pinterest and set your boards up the same way!
10) Start Pinning! Once you have your profile all set up and all your Pinterest boards named, go ahead and start pinning 3rd party pins (other peoples pins) into your boards (but not your “Best of…” board!). Remember to pin every day in the beginning. Even if its just a few at a time. Pinterest wants to see you as an active and consistent user. And if Pinterest sees you this way, they will reward you later by putting your pins in front of many eyes as well.
What’s next?
I think I may have made you go into a little bit of Pinterest overload here yet there is still SO MUCH more to Pinterest then we have even started to talk about. But in hopes of not burning you out before you even have a blog up and running, we will stop here for now and talk about Pinterest more another day. Then we can talk group boards and Pinterest analytics and followers… oh my!
For now, get that Pinterest profile going and get that blog up and running!
Good luck!
Jenny

Leave a Reply